Sunday, July 29, 2012

Arugula, sun-dried tomatoes, pine nuts, goat cheese and penne!

I went searching on pinterest for a pasta dish that I could make with the big jar of sun-dried tomatoes I just bought at Costco, and came across Skinny Ms blog. She has some great low fat recipes. The one I made is called Mediterranean Penne, and although I'm weary about trying recipes I've found on Pinterest, I've made a lot of yucky ones, I went ahead and gave it a shot. It was freakin' delicious! Like, I had two bowls and considered a third delicious! But seeing how I'm getting in a wedding dress in less than 3 weeks, I opted to save the third for lunch tomorrow. I can't wait to wake up!


Ingredients
  • 5 cups cooked whole-grain penne pasta, cook until al dente
  • 2 tablespoons extra virgin olive oil, divided
  • 2 garlic cloves, minced
  • 3/4 cup sun-dried tomatoes packed in olive oil, coarsely chopped
  • 1/2 teaspoon black pepper
  • Salt to taste
  • 1/2 teaspoon crushed red pepper flakes
  • 1/2 cup pine nuts
  • 2 cups baby spinach (I used 1 cup organic spinach, 1 cup organic arugula)
  • 1 cup fat-free feta cheese (I used 1 cup goat cheese, and it wasn't fat free)
Directions

Cook penne according to package directions. Add 1 tablespoon extra virgin olive oil to a large skillet, and saute garlic over medium-low heat until fragrant, about 1 minute. Add to skillet the sun-dried tomatoes, black pepper, salt, and red pepper flakes, and continue to saute 5 minutes or until tomatoes are soft. Add cooked penne and remaining tablespoon of oil; toss to coat, cover, and cook on low an additional 2 minutes. Add pine nuts and baby spinach, toss to combine. Turn off heat, cover and allow spinach to slightly wilt, about 2 minutes.
Sprinkle on feta cheese and serve.

Monday, July 23, 2012

Random, healthy, delicious salad.

Don't you just love it when you throw whatever you have in the fridge into a bowl, and it turns out amazing?! Well, that's what happened to me the other day. I got lucky, real lucky.

The result of what I had in my fridge, was a delicious, healthy salad. Since I just threw everything into a bowl, I'm not sure about exact measurements, but here are the ingredients...


Spinach or some type of greens
Fresh mozzarella balls
Beets
Jicama
Avocado
Mandarian oranges
Sunflower seeds
Squeeze of fresh lemon
Dash of olive oil
Dash of aged balsamic vinegar


Friday, May 4, 2012

Reclaimed, Dining room table

Our table is finally done!

After looking through pinterest for ideas for a great reclaimed table, we decided it wasn't in our budget to buy one, so we started looking into making one. I found a blog with a DIY reclaimed table, and it seemed easy, but timely. When your remodeling your home, working, and caring for an infant, time is something you lack. Trey searched Craigslist for some used lumber anyhow, and came across Pieces of the Past in Johnson City, Texas. He decided to make the trip out there one day, and came home with 3 pieces of wood from the floor of an antique boxcar. He was also given the name of a local carpenter, Tony Romano, who could build the table for us.

All in all, the table ending up costing about $1000 cheaper than if we had bought it in a store. Not as cheap as if we had built it ourselves, but considering we don't have a spare second, it was worth every penny!

Wood, $70 per plank
Table, $500
Bench, $200


It turned out so beautiful. Way beyond our expectations.

Wednesday, April 4, 2012

Framing ultrasound photos, weird?

So, I got bored while Fia took her second 2-hour nap, and ran across her ultrasound pictures. Since I just made a cool collage with Hipstamatic prints, I decided to do the same with the ultrasound photos. I had an extra frame for her room that I hadn't yet filled, so I started cutting and pasting. I came up with this...


I love it, I think it's a great way to preserve and display these priceless prints of my little springroll. Trey on the other hand, thinks it's freaky. What do you think?!


Crafty. Framing Hipstamatic prints...

So I've decided that I'm not much of a blogger. In order to be a good blogger, you must think as a blogger, which means you must always be thinking, and sometimes, I don't want to think! I just want to veg out with some wine and trash TV! With that said, I have some extra time tonight as Trey is out with the boys, and there ain't shit on TV, so I'll take this time to inform you of my latest craft projects.

I decided I needed to do something with all 2,000 photos I have on my phone. Most of them taken with photo apps like Hipsmatic and Instagram, so there are some pretty cool, artsy ones. So, this is what I did...

1- I took the black and white photos using the Hipstamatic app. I choose Blackeys for my film, and Jimmy for my lens.

2- I downloaded my faves, and ordered the prints at Walgreens.com. When checking out, choose the TrueDigitalPrints option, so that they don't stretch your photos. They will make the photos true to size which is about 3x5. It will still print on a 4x6, so it will come with a border.

3- Once I had the prints in hand, I measured and cut them to fit into a white frame I bought at IKEA for $19. I love the result, very vintage-y!


Here is one in color...it was taken at night, with an overhead light on, so it looks yellow, but its just as white as the frame above.


Thursday, February 9, 2012

DIY gallery frame wall

I love gallery frames, I just hate hanging them. I'm such a perfectionist, that it drives me crazy if one is crooked, or not in alignment. No matter how hard I try, it seems like a bit of defection is inevitable. Mine looks pretty good. I promised myself not gonna dwell on the little things.

1). I first bought 10 frames, all the same style, but at least 4 different sizes. I bought one large one, and at least 2 of the same ones in the other sizes.

2). I then traced all the frames onto paper and cut them out to use as templates. I used the templates to rearrange on the wall until I had the desired effect. Using an imaginary box helped with my borders, and painters tape allowed me to easily remove and replace.


3). Once I had the templates in place, I measured the back of the frame to make sure I got the nail in the right place, and then went ahead and hammered the nail right into the paper. The paper is helpful not only as a template, but you can also make marks on it.

4). Remove the paper, and start hanging!


Nutella and banana stuffed croissants....yum!

I have no idea where I  got the inspiration for these. I'm sure it was pinterest or some blog. Wherever it was, I'm glad I saw them, cause they were delicious!!! I could eat them all day long, for real.


Ingredients:
Nutella
Banana
Pillsbury croissant dough

Unfold the dough on a cookie sheet. Place a scoop of nutella and a slice of banana in the middle. Fold the dough starting with the short side, then the long side, then fold up the middle flap to create a dumpling! Bake for 12 minutes at 375!

RESULTS: Hazelnut chocolate and banana? Um, yea, you can't go wrong! So good, and the perfect size. They were even good, if not better, when I microwaved them for 30 seconds a few hours after they had cooled. Nutella came oozing out of the sides!!!


Thursday, February 2, 2012

10 Tips for online dating.

I'm by no means an expert on the matter, but, I was on match.com for several months and went on my fair share of good and bad dates. Plus, I'm engaged and have a baby with someone whom I met online! So, I obviously did something right! Took me awhile though. Read this, and don't make the same mistakes I did!

1. First and foremost, don't be embarrassed about online dating.

Everyone is doing it, and if they say they aren't, they are lying. In this day and age, it's the norm. A stranger is a stranger no matter if you meet him online, at the park, or in a bar. The only difference is seeing the person, in person, which yes, helps a lot with chemistry. But, with online dating, you get the perks of knowing all the "basics" right off. Like, does he want to have kids? Is he Christian? Does he make a shit ton of money?

2. Only date guys with multiple photos, including full body shots, and preferably dressed. Same goes for you too!

I once went out with a guy who only had head shots on his profile. Well, turns out his head was drastically smaller than the rest of his body. It was odd, and definitely a turn off. I called him pea head, to my friends of course. May have been shallow of me, but I think it's only fair to know exactly what you are getting. Request a full (recent) body shot, if there isn't one. That way you will know if he's short, tall, fat, or skinny. No surprises.

3. Stay away from guys who take pictures of themselves in the mirror.

(got this amazing example online)

He probably doesn't have any friends and thus had no one to take his picture for him. Okay, I'm jumping to conclusions. But, it's super cheesy, especially when they are shirtless, flexing their muscles. To be honest, I've never seen a self-portrait I've liked, so this ban applies to you too ladies! I'm sure you have a pretty picture on your computer you can upload. If you don't, you might consider getting a life.

4. It's ok to initialize contact with a wink, but leave it at that. 


Just because you are looking for love on the computer, doesn't mean chivalry has to be obsolete. Let the man make the first move by contacting you with an email. Or, wink at him to let him know you are interested. If he winks back, without sending an email, then kick him to the curb. He is obviously lazy, the worse quality a man can possibly possess. To sum it up, if he winks at you, wink back, and wait for an email. If you wink at him, and he winks back and never sends an email, then he is a bona fide loser.

5. If interested in one another, try to meet in person, immediately. 

Don't shoot the shit too much over email and phone. Anyone can get along using those means of communication. It won't be until you see him in person whether or not you have any chemistry. So tell him you aren't very good at emailing back and forth and would prefer to get to know each other over coffee. And make sure it's JUST coffee. (see tip #6)

6. The first date should only be coffee or something similar. 

Don't plan to go to dinner, then dancing, then to an after party, with someone you've never even met! I made this mistake and had to fake an allergy attack to get out of it!

Just because you hit it off on the computer/phone, doesn't mean you are going to like him when you see him in person. Sorry if I come across as shallow, but we fall in love based on initial attraction, and pheromones. You have to see someone, to fall in love with them. I know there are a few cases where people claim to have fallen in love without even meeting, but come on, that's fairytale BS. So, trust me, don't waste your night on someone who you might never talk to again, and just go have some coffee!

7. Don't bring your wallet.

Whatever, call me what you want, a gold digger, shallow Hal, blah blah blah. I'm none of those. If I were, I would say go out for an expensive dinner and let him pay! But rather, I'm saying go out for coffee and let him pick up the $2.50. If he can't afford that, then he can't afford you. Period. Not that you're for sale, but you know what I mean. I've been a guys sugar momma before, and it ain't fun. Driving him around town, paying for his dinners, ew, what a sucker I was! Don't let this happen to you. End of story, no excuses.

8. Do not, by any means, shape or form, talk about STDs, exes, bad credit or your five bastard children on a first date! This should be common sense.

We all have baggage, I get it, but let the man get to know you first, before unloading it on him. And vice versa. If your date says "ex" every other sentence, then don't bother with him, he is obviously still hung up on her!!

9. Don't put out on the first date.

I work with a guy who was on eharmony and match just to get some action, and guess what?! He got a TON!!!

If you serious about meeting the love of your life, then take it slow. I admit, there are some few and far between cases where one night stands lead to marriages, but what's the hurry? Don't be a victim of my coworker and other guys who are only on the site to get laid, gross.

10. Follow-up.

If you really enjoyed yourself, it's okay to text the guy after the date to let him know. A simple, "thank you, I had fun, we should do it again," lets him know you are interested and puts the ball in his court. DO NOT contact him again after that though, let him contact you! Remember, chivalry doesn't have to be dead just cause your online!


Other "obvious" tips:

Never let him pick you up on a first date. You just met the guy online, please don't give him your address!

Meet in a public place. Let someone know that you are going on a date and where you will be.

Don't be stupid, a stranger is a stranger!


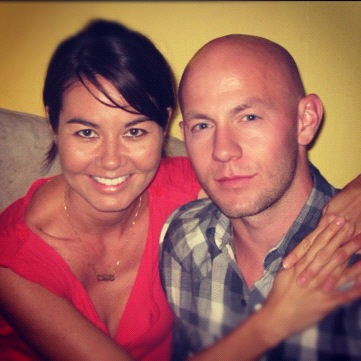
Trey and I a couple of weeks after we met on Match;)


****UPDATE****

My best friend, who is now on Match.com, went to a guys house for the first date. DO NOT DO THIS! They just want to make-out with you!! Plus, he can be a serial killer! Meet in a public place, drive yourself, and tell people where you are going!


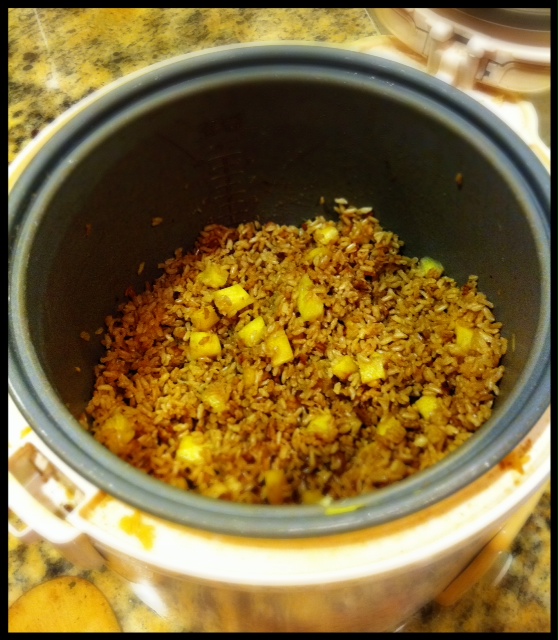
Pineapple ginger brown rice!

Tonight I decided to add some pizazz to my brown rice. I'm glad I did, it turned out great! It would be perfect as a side dish, or with a stir fry. I made mine in a rice cooker, but here are instructions for the stove top.


1/2 cup water
1/2 cup pineapple juice
1 tbsp fresh ginger
1/2 cup brown rice
3/4 cup diced fresh pineapple
1 tbsp low sodium soy sauce
1 tsp sesame oil
1/4 tsp sea salt

Bring water, pineapple juice, ginger and brown rice to a boil over med-high heat. Reduce to med-low, cover and simmer until liquid is absorbed, about 12-15 mins. Fluff rice and stir in pineapple, soy, sesame, and salt. Serve.


Here it is with the stir fry I made, recipe to come!


RESULTS: A easy way to spice up a boring, yet nutritious grain. Great with chicken. Also adds complementary flavors to any stir-fry. It's da bomb, really.

Wednesday, February 1, 2012

Soy glazed crock pot chicken!

So, I've been getting Real Simple magazines in my mailbox. I guess the previous owner had a subsrciption, SCORE!! I love Real Simple mag, it's the best for everything, especially healthy recipes.

Last months edition had numerous recipes for crock pot cooking, including one for soy glazed chicken thighs. Since my parents were coming over for dinner, I thought what the heck, lets give it a whirl. Anything Asian is right up our alley, so I figured I couldn't go wrong.

I didn't get a chance to take a picture of it, mainly because I was lazy and served it on paper plates, so here's the magazines picture. I stuck to the recipe with the regards to the chicken, but only sauteed bok choy on the side due to time restraints!


Ingredients


2 cups rice, brown or white cooked

  • 2 heads baby bok choy or napa cabbage
  • 2 tablespoons sesame oil

Add the first 6 ingredients to the crock pot, stir. Add chicken thighs, and toss till they are coated. Cook for 8 hours on LOW. When finished, remove chicken and set aside. Put liquid into a sauce pan and thicken over medium-low heat, 5-6 minutes. Pour over chicken and rice. 

In a frying pan, add 2 tablespoons sesame oil over medium heat. Add cleaned, and chopped bok choy. Saute till wilted, adding a few splashes of soy sauce and black pepper along the way. Takes about 7-10 minutes for the bok choy to be nice and tender.

RESULTS: My mom said, "this is so good," at least 3 different times. My dad asked my mom, "how did she get the chicken so tender?" And Trey told me "this is the best meal you've ever cooked for me!" Thanks Miss Crock Pot (I will soon name you, don't worry).


Wednesday, January 25, 2012

Yo, Baby!

I looooove Yobaby by Stonyfield! Maybe I'm out of touch, but I just discovered it and I'm so happy I did. If you haven't heard, then listen up!!

Yogurt, unlike milk, can actually be given to babies who are 6+ months. Check with your pediatrician first, of course. They recommend plain, whole milk yogurt. So I went looking for organic, plain whole milk yogurt and came across the Yobabys. They happened to be just what I was looking for, and more!

Not only are Yobabys offered in convient 4oz packages, there are a variety of flavors. There are single ingredient ones like blueberries, and meals, like pears with green beans. There's also a plain one, which you can add your own organic fruit to if you like. I give my daughter one for breakfast every morning, and so far, there isn't a flavor she doesn't like.

I've been only feeding organic homemade meals to my daughter thus far, because I don't trust what they put in those little jars. But, I trust Stonyfield and this yogurt. There isn't anything artificial about it. No additives, no hard words to pronounce. Just yogurt, fruit, and veggies. That's a recipe for perfection in my book!

Enjoy!


Tuesday, January 24, 2012

Trey's bacon wrapped, rosemary pork tenderloin!

My fiance rocks. He is seriously good at everything he does, especially cooking. This morning he woke up, fed our daughter, prepared the tenderloin in the slow cooker, ate breakfast, got ready for work, and took off for a full day of wheeling and dealing. Then he came home from work, played with our baby girl, gave her a bath, fed her, read her a book (sometimes with a British accent), and put her to bed.  Yes, I am one lucky girl.

He came up with this yumminess on his own. No recipe, no guidelines. Just a Southern boy and his first class palate!


I don't have a proper recipe for this, since Trey just threw everything
in the crock pot, but here are some guidelines:

2lbs pork tenderloin (or enough to cover the bottom of the crock pot)
1 1/2 cup beef broth (or chicken broth)
6 strips uncooked bacon
4-5 carrots, chopped
4-5 sticks organic celery, chopped
3 sprigs rosemary
5 whole cloves garlic

Trey first browned both sides of the pork in a sauce pan. Then he placed the rosemary on each one, and wrapped it in bacon. He then placed the meat in the crock pot, added the garlic cloves, and poured the beef broth on top. He cooked the pork on LOW for 8 hours. With 2 hours remaining, so 6 hours into cooking, he added carrots, celery and potatoes. Serve. It will fall apart with a touch of a fork. So flavorful, especially with the sauce poured on top of the meat. Can't wait to have leftovers tomorrow.


Sunday, January 22, 2012

Slow cooked cilantro lime chicken, yum!

My old college roommate, Paige, posted this on Facebook, so I decided to try it. Since I'm a "new" slow cooker user, I'm constantly looking for a good recipe to try. Well, let me just say, not only did it make the house smell good, but it actually tasted amazing! Lots of flavor, with just the right amount of citrus and spice. If you love cilantro, you will love this.

Since the chicken shreds apart with a fork, I put mine on a fresh corn tortilla, with a dollup of sour cream. It was perfect.


In a slow cooker, mix together:
One 24-ounce jar medium or mild salsa (I love Central Markets Organic brand)
Juice from one lime
1/4 cup fresh cilantro, chopped
One 1.25-oz. package taco seasoning (I used low sodium)
2 jalapeno peppers, finely chopped, optional (I used one and a half)
Add 4-6 thawed chicken breasts and coat
Cook on low for 6 hours and serve immediately. I noticed the longer I waited to eat it, the drier it got.
ENJOY!


Thursday, January 19, 2012

Post Workout Smoothie with Oatmeal!

This is mine, if you have a good one, please share! I like to change things up every now and then by adding things like flaxseed, hemp seed, fresh ginger, whey protein, yogurt, and a large variety of fruits, especially figs when they are in season. This month I'm addicted to adding oats to my smoothie.


1/4 cup oats
1/4 cup frozen berry mix 
1 cup almond milk (vanilla or not)
1 banana
1 heaping spoon of Sunbutter (sunflower seed butter)

Add oats to blender and pulse into a powder. Add remaining ingredients and blend until desired consistency. Enjoy!

Wednesday, January 11, 2012

Shrimp, avocado salad by Grandma!

I'm staying with my parents for a few nights while Trey is out of town on business. I'm still freaked out about the attacks on NYE, and it's nice to spend time with them. Fia totally knows both of them now, and really enjoys their company. They make her laugh, a lot. Plus, my mom is an AMAZING cook (ask any of my childhood friends), so thats a major bonus. Her specialty is Vietnamese, but everything she puts her hands on tastes pretty darn good! Tonight she made an avocado, shrimp, brown rice salad she found in Women's Health Magazine. She was super excited for me to try it, since we love exchanging healthy recipes. As usual, it was divine.

I hope these pictures give it justice. Sorry about taking a picture of the actual recipe, I'm feeling lazy tonight. Email me if you can't read it, and I'll send you a typed-out version, but not till tomorrow:)


Here's my mom playing with Fia this morning around 7am. Thank god for Grandmas!


Alright, gotta go, being beckoned by my parents to beat them in rummikub!


Tuesday, January 10, 2012

Free swim classes!

Ever since Fia was 3 months old, I been taking her to a class called Bathtime Babies at Emlers swim school here in Austin. It's once a week for 16 weeks for babies between the ages of 2-6 months (they are flexible, give or take a month). And the best part is, IT'S FREE!!


If you've just had a baby, or have one within the age bracket, I highly recommend that you sign up for this class. Actually, I can't recommend it enough. It's a mommy and me class, and it's super fun. Not only will your little one become more comfortable in the water, but it's a great activity to get you out of the house, and meeting other moms.

Sadly, our 16 weeks have expired, and quite frankly it ain't cheap to take the next level class, Waterbabies, but...I'm doing it!! To me, it's worth every penny. In Texas, the number one cause of death for children under the age of 5, is drowning. I don't want to be a statistic. Besides that, it's really good exercise, and helps promote independence.

It's been so much fun watching Fia grow in the water. She kicks, strokes and puts her head comfortably near the surface. She even floats, and doesn't mind getting water in her ears, mouth, or eyes! This is a huge difference from her first class 16 weeks ago when she clung to my neck the entire time!

For more info check out Emlers website. I'm pretty sure they will be starting a new session soon, since mine just ended.

P.S. My friend Maya, who is an infant swim teacher on Maui, told me to take showers with Fia the minute her umbilical cord fell out. This way she could get use to water flowing over her head and eyes. To this day, 7 1/2 months later, we still haven't used her infant bathtub!


Lentil with carrot and Brown Rice, for baby.

Found this recipe on wholesomebabyfood.com, and decided to make it. I love their recipes, so heathy and hearty. Not too mention, so cheap and easy! These 3 ingredients cost me $5 and will yield baby food for months! I went ahead and bought all of these in their conventional form, since none of them are on the dirty list.

I found that I had to simmer them for a little longer then what the recipe called for, in order for the rice to be tender. Once in the blender I used almost a cup of water to make it into a puree, without it, it was more like a paste. I think this dish would be fantastic with some curry powder or allspice, I think I might add some tomorrow! She loves spices, just like her momma!


Lentils with Carrots & Brown Rice
2 cups of water
3/4 cup of red split lentils
1/2 cup peeled and diced carrots
1/4 cup brown rice
pinch of curry powder (optional)

Combine all ingredients in a large saucepan. Bring mixture to a boil and then simmer for approximately 20 minutes. Check on the level of the water and add water as needed. The mix will be finished when the rice is done, the carrots are soft and the lentils have "melted".

Blend the Lentils with carrots and brown rice as needed to create a texture acceptable for your baby. 


Monday, January 9, 2012

Tomato Basil Soup with Ginger!

I love tomato basil soup on cold rainy days like this. So, I went to my "go to" online recipe book, Allrecipes, and found this awesome recipe! Because I'm a ginger fanatic, I modified it a bit by adding an inch of freshly grated ginger as it simmered. It was deee-licious!

Oh, and don't forget the grilled cheese. I made mine on 8 grain bread with provolone cheese (gouda is yummy too)! So, do yourself a favor, and stop by the store on your way home from work and make this for the whole family to enjoy!


Ingredients

  • 4 tomatoes - peeled, seeded and diced (I didn't peel mine)
  • 4 cups tomato juice
  • 14 leaves fresh basil
  • 1 cup heavy whipping cream (I used half n half)
  • 1/2 cup butter
  • salt and pepper to taste
  • 1 inch grated ginger (optional)

Directions

  1. Place tomatoes and juice in a stock pot over medium heat. Simmer for 30 minutes. Puree the tomato mixture along with the basil leaves, and return the puree to the stock pot.
  2. Place the pot over medium heat, and stir in the heavy cream and butter. Season with salt and pepper. Heat, stirring until the butter is melted. Do not boil.


Sunday, January 8, 2012

"Hawaiian" Chicken in a crock pot.

Well, I fell on the "Hawaiian Chicken in a Crockpot" bandwagon. Everyone on pinterest seems to be doing it. It's simple and cheap, so why not? Before I go on, let me add that I can't believe I am sharing crock pot recipes, I am officially a MOM. I have a dust buster too....and I just cut my hair short....and I drive a Chevy Tahoe...alright, enough stereotyping.


Ingredients:
4-6 frozen chicken breasts (I prefer thighs, but I did use breasts)
1-bottle Archer Hawaiian BBQ sauce
1-20oz can crushed or diced pineapple (drained)

Dump it all in your crock pot. Cook for 6 hours on LOW. In the last 10 mins, shred the chicken with a fork so it can really absorb all the flavors. That's all folks.

I served mine on top of brown rice with a salad on the side.


It was good, not great. Not sure what all the hype is about on pinterest. The chicken tasted like dark meat, it was so tender and juicy, but the sauce lacked something. It was sweet and that's it. No spice, no smokiness, no real defined flavor. If you decide that you MUST try this, than add some flavor to it. Maybe some cayenne or ginger. Or, if you have simple palate, then this just might be the recipe for you! 


Saturday, January 7, 2012

Stenciling

I discovered how easy stenciling was when I was decorating my daughters nursery. I wanted to put something pretty on the wall above her crib, but I was too scared to hang anything in the event it might fall on her while she slept. I know, I'm super paranoid. So, I looked around and found wall decals, and stencils. I've heard that wall decals come off the wall easily, especially if your wall is textured, so stenciling was the obvious choice.

After shopping around, etsy once again came to the rescue. I found these awesome lotus stencils.

I ordered the medium size, got it in the mail a few days later, and went to town! It was stressful at first, making sure the paint didn't run out of the lines. But, in the end, it came out really beautiful, both times! Since we just moved, I used the stencil for her new room too!

Here are some tips:

1). The instructions say to use a roller brush, but the guy at Lowes suggested a ponce brush. That way you can literally "pounce" it on. It was only $7 so I gave it a shot. I'm glad I did, it made the job so much easier.

2). It's hard to get the stencil to lay flat against the wall. So, along with double-side taping it in various places, I held down each section with my hand as I painted it.


3). Don't put too much paint on your pounce brush, it can cause bleeding. This happened to me the second time I did it. At first it bugged the crap out of me and I had plans to fix it with a tiny artist brush, but realized you couldn't notice the imperfections from far away, so I left it.

Wa-la! Your stenciling is complete, and your room looks fabulous! If it doesn't just paint right over it, and start again!


Friday, January 6, 2012

Bioluminescent Bay, P.R....Go here A.S.A.P!

Glow while you float, or float while you glow!
Whatever, just do it!!
It's the craziest, coolest thing ever.
It's cheap to fly to PR, and travelling around is easy breezy.
Plus, PR has some of the most beautiful beaches in the WORLD!
Okay, have a safe flight.

I did not take this photo. Frank Borges did. 
This is not me, but I'm sure this is what I looked like.


The best place to swim/kayak with the bioluminescent, is at Mosquito Bay on Vieques Island, P.R. due to it's high concentration of these tiny little organisms. Click here for more info.

For more Puerto Rico pics, click here.

Wanna see a Favela? As in, a slum, in Rio?

Now you can! I was in Brazil a couple of years ago, and this American dude, who had lived in Brazil all his life, was offering tours of Rochina, a favela in Brazil. I couldn't believe it. The only thing I knew about favelas was what I had seen in the movie "City of God." The movie was named after an actual favela in Brazil, the rival favela of Rochina! So, when a lad at my hostel asked me if I wanted to tour the favela on my birthday, the obvious answer was, "hells yes!"

The slums were exactly how I pictured them to be, dirty, smelly, and dangerous. Yes, there were young men walking around with pistols in their pants. Yes, everything was stolen, including their electricity. Yes, it was scary, and intriguing, and WAY better than seeing Cristo Redentor!


If you want to see more pictures of the favela, Rochina, or my time in Brazil, click here!

Thursday, January 5, 2012

Fia and the Cookie Monster!

I haven't yet had professional pictures taken of Fia, but I have this, and this just rocks. Makes up for all the money I haven't spent on photos!


Wish I could say I just happend to "capture" this photo, but it was staged, and took me numerous shoots with my Canon Rebel! 

DIY Christmas Cards 2011

I love how our Christmas cards came out this year. They look so professional, even though they are so not! After looking through pinterest for ideas, I decided I wanted to do black and white with red highlights. This is what I came up with.

We took our Canon Rebel XSi with our 50mm lens to Town Lake, and started playing around with the setting and lighting. Once I liked what I saw, I asked someone walking by to take this picture of us.


I took the picture home, cropped it, turned it into black and white, and then sent it to my friend who highlighted the bow with saturation in Photoshop. I then added the template on Costco.com, and wa-la, super duper cheap, yet professional looking Christmas cards! 


Whole Wheat Blueberry Pancakes, with Almond Milk!

My fiance made these for me a couple of months ago. They were freakin' delicious and totally reaffirmed why I said yes when he asked me to marry him. If you don't feel like mixing, you can buy the pre-packed whole wheat mix, just use almond milk instead of whole milk.

We use a cast iron griddle to make our pancakes, but of course, you can do it on a stove top skillet as well. We had bananas and organic blackberries laying around, so he threw those on top. And of course the syrup, we like the all-natural kind without the high-fructose-corn-syrup. Target sells the "Archer" brand for cheap, seems to be expensive everywhere else. Enjoy!


  • 1 1/4 cups whole wheat flour
  • 2 teaspoons baking powder
  • 1 egg
  • 1 cup almond milk
  • 1/2 teaspoon salt
  • 1 tablespoon agave nectar
  • 1/2 cup organic blueberries